Airflow
In Airflow, we define Directed Acyclic Graphs (DAGs) that build our data-processing pipelines. These DAGs are composed of multiple operators, each serving a specific task. Within Kaapana, we categorize operators into two types: Local operators and containerized operators. Local operators are executed within the airflow-scheduler container. On the other hand, when a containerized operator is triggered, a dedicated Kubernetes job is spawned, encapsulating a container responsible for executing the operator’s code. We commonly refer to these containers as processing-containers.
Furthermore, Airflow functions as the scheduling system for the data-processing-pipelines. The Airflow user interface offers comprehensive insights into DAGs, DAG runs, and their scheduling details.
The platform comes with several preinstalled DAGs and a large set of custom operators. Additional DAGs can be installed as ẁorkflow-extensions in the Extensions page.
Preinstalled DAGs
collect-metadata
convert-niftis-to-dicom-and-import-to-pacs
delete-series-from-platform
download-selected-files
evaluate-segmentations
This DAG is designed to compare two sets of segmentations, a ground truth and a prediction. All of the segmentations should be in the same dataset, the distinction between ground truth and test data is done via a test_tag. More information about tagging data can be found in Datasets. Note that you can either tag images manually, or use tag-dataset workflow to apply to an entire dataset.
Additionally, the DAG also contains a preprocessing step to fuse several annotation labels into a new unique label for better label specification. This fusion operation can be done for both the test data and the ground truth data.
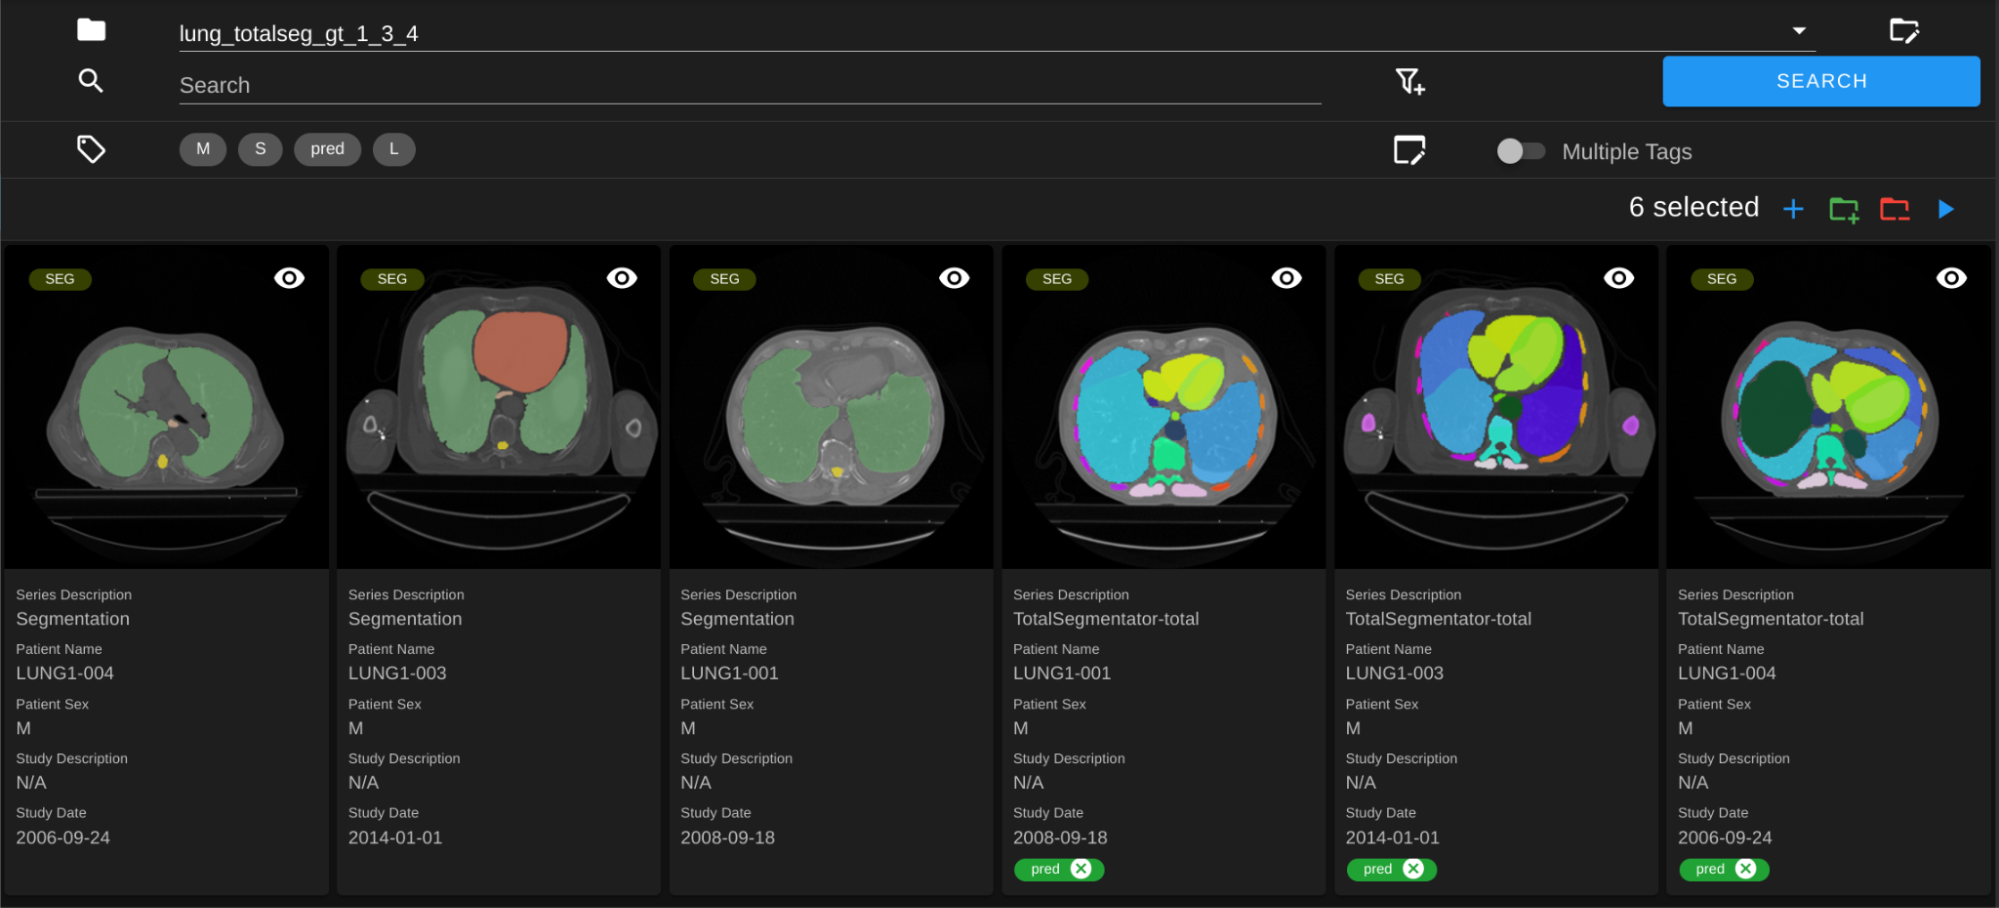
As an example, let’s say you run a DAG like TotalSegmentator on CT data and get predicted segmentations. First, you can create a new test dataset with all new segmentations (by filtering for Series Description, and more, to get all relevant segmentations and click on Save as Dataset). Then you can go to this dataset and run tag-dataset DAG. Now that all the predicted segmentations are tagged, you can create a new dataset with ground truth segmentations. After selecting this gt dataset, you can click on the Add to Dataset button to add the test dataset on top of it.
Select the dataset that contains both test and gt segmentations. In the screenshot below, the predicted segmentations from TotalSegmentator are tagged with “pred”.

In the workflow form, fill in the parameters as follows:

Evaluation metrics available: select the metrics you want to run on the data. More details about the metrics can be found in Monai Metrics docs .
Tag: the tag that you use to separate ground truth from predictions, for this example we use
pred.Filter GT: for filter operator, use
KeeporIgnoreto specify annotation labels that you want to filter in ground truth data. You can check the annotation labels of data by double clicking on them in Datasets view. Can also leave empty if you want to use all labels in the downstream operators.Filter Test Seg: same with test data. Here we only select the ones we are interested in, because TotalSegmentator generates a lot of segmentations that are not useful for us in this case.
GT Fuse Labels: the label(s) that you want to fuse into a new label. In this example we are fusing
lunglabels (each segmentation has two with same name)GT Fuse New Label Name: the name of the new label created by fusing the labels above.
lungsgtfor this example. Note that all the special characters will be removed from this label.Test Fuse Labels: same with test data. In the example here we are fusing all the lung parts into a single “lungstest” label
Test Fuse New Label Name: same with test data
Label Mappings: in the format of
gtlabelx:testlabely,gtlabelz:testlabelt, include all the label mapping that you want to evaluate from GT and test data.
In Minio, the metrics.json file containing the results should be available under
evaluate-segmentationsfolder.
 {
     "1.2.276.0.7230010.3.1.3.17448391.39.1711634044.28207": {
         "dice_score": {
             "lungsgt:lungstest": [
                 0.9780710339546204
             ]
         },
         "surface_dice": {
             "lungsgt:lungstest": [
                 [
                     0.5737958550453186
                 ]
             ]
         },
         "hausdorff_distance": {
             "lungsgt:lungstest": [
                 [
                     25.475479125976562
                 ]
             ]
         },
         "asd": { // average surface distance
             "lungsgt:lungstest": [
                 [
                     0.44900786876678467
                 ]
             ]
         }
     },
     ...
 }
import-dicoms-in-zip-to-internal-pacs
send-dicom
service-daily-cleanup-jobs
service-extract-metadata
service-process-incoming-dcm
service-re-index-dicom-data
service-segmentation-thumbnail
tag-dataset
tag-seg-ct-tuples
tag-train-test-split-dataset
train-with-pretrained-weights
This DAG allows users to run available training DAGs starting with previously trained model weights. It expects at least one of the two following DAGs to be installed: nnunet-workflow or classification-workflow. After selecting one, it is possible to choose a pretrained model for warm start. All the other fields will be the same as in the original DAG.
The parent DAG will trigger one of the two child DAGs, passing the pretrained model path as parameter, and the child DAG run will be shown as a service workflow in the workflow list. It is only possible to start/stop individual jobs of a service workflow.
Note that if either nnunet-workflow or classification-workflow is not visible under Training Workflow option, even though they are installed as extensions, it can be the case that airflow-webserver did not refresh and pick up the changes yet. You can just wait, use the refresh button in the workflow execution form or delete airflow-webserver pod via kubernetes to make sure the changes are up to date.